Installing Mule ESB on Raspberry Pi 3
Mule runtime is a lightweight, java based enterprise service bus (ESB) and integration platform. It allows developers to connect with different systems and applications. It’s so lightweight that it can run on a Raspberry Pi 3. In this article, we will see how to install Mule Community Runtime 3 on Raspberry Pi 3.
What do we need?
This article assumes that you are familiar with Raspberry Pi and MuleSoft ESB server. Below are the pre-requisites for this installation -
-
Raspberry Pi 3 device with latest Raspberry Pi OS installed.
-
Access to internet
Update Raspberry Pi
Open the terminal prompt on Raspberry Pi and run below commands to make sure everything updated and upgraded [Note: You may skip this, if you don’t want to change your os installation]-
sudo apt-get update && sudo apt-get upgrade
Installation Folder
Create new unix user id mule to own mule installation. Run
sudo useradd mule and follow the instructions on screen.
Now, let’s create a folder to host the mule installation. Run below commands in terminal on pi -
sudo su
mkdir /opt/mule
chown mule:mule mule
cd /opt/mule
sudo su mule
mule folder is now owned by mule id instead of root and we will use mule id for installation.
Download Mule Runtime
You can grab the Runtime download link (for .tar.gz) from MuleSoft Developer Portal. You should get the link for 'Mule standalone runtime (without Anypoint Studio)' version.
For this tutorial, we will use Mule Runtime v 3.8.1 available here.
In the terminal, run below commands to download and extract the archive -
cd /opt/mule
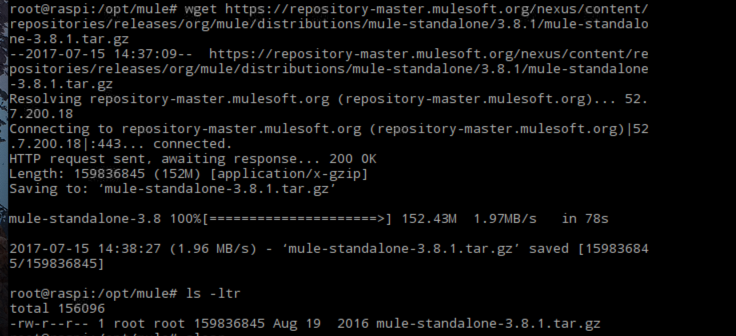
wget https://repository-master.mulesoft.org/nexus/content/repositories/releases/org/mule/distributions/mule-standalone/3.8.1/mule-standalone-3.8.1.tar.gzOutput on console should be like this -
Extract and First Run
To extract the downloaded archive, run below command on terminal in mule folder, to extract the archive in current directory -
tar -xvf mule-standalone-3.8.1.tar.gz -C .
Let’s give a try to start mule server as-is. Run below commands on terminal -
mule@raspi:/opt/mule# cd bin
mule@raspi:/opt/mule/bin# ls -ltr
total 48
-rw-r--r-- 1 15000 15000  5046 Aug 17  2016 mule.bat
-rwxr-xr-x 1 15000 15000 20467 Aug 17  2016 mule
-rw-r--r-- 1 15000 15000   669 Aug 17  2016 launcher.conf
-rw-r--r-- 1 15000 15000  4025 Aug 17  2016 launcher.bat
-rwxr-xr-x 1 15000 15000  1085 Aug 17  2016 launcher
-rw-r--r-- 1 15000 15000  5128 Aug 17  2016 additional.groovy
mule@raspi:/opt/mule/bin# sh mule start
MULE_HOME is set to /opt/mule
Your machine's hardware type (uname -m) was not recognized by the Service Wrapper as a supported platform.
Please report this message along with your machine's processor/architecture.
mule@raspi:/opt/mule/bin#
What just happened? Mule runtime is complaining and denying to start!!
Let’s see what uname -m outputs on our pi -
mule@raspi:/opt/mule/bin# uname -m
armv7l
Apparently Mule Community Edition does not contain java wrapper for ARM based machines like the Enterprise edition which has this support.
Configure Java Service Wrapper for Raspberry Pi 3
This Stackoverflow answer helped me to put missing puzzle in place i.e. Java Service Wrapper for ARM based linux machines. Below steps are from that answer -
-
Download the Linux armhf 32-bit Community Tanuki Java Service Wrapper and unpack it
-
Copy the Wrapper lib/libwrapper.so to $MULE_HOME/lib/boot/libwrapper-linux-armhf-32.so, ensure it has read+execute permission and is Mule user owned
-
Copy the Wrapper lib/wrapper.jar to $MULE_HOME/lib/boot/wrapper-v2.6.6.jar (replace v2.6.6 by your Wrapper version), ensure it’s Mule user owned and remove or backup somewhere else the previous wrapper-{oldVersion}.jar
-
Copy the Wrapper bin/wrapper to $MULE_HOME/lib/boot/exec/wrapper-linux-armhf-32, ensure it has read+execute permission and is Mule user owned
-
This one is a bit tricky, you have to update the $MULE_HOME/bin/mule launch script. Look for the line case "$PROC_ARCH" in, Such as:
'x86_64')
    DIST_ARCH="x86"
    DIST_BITS="64"
    break;;
Each case match a specific hardware name to define DIST_ARCH and DIST_BITS variables, allowing to use the proper Wrapper files. Add a new case to handle our Raspberry PI hardware:
'armv71')
    DIST_ARCH="armhf"
    DIST_BITS="32"
break;;| When I copy pasted above content in script, it did not work. I had to re-type armv71 to make it work. May be some special characters with paste :). |
You may need to update $MULE_HOME/conf/wrapper.conf to have lower memory related values to avoid memory related issues.
wrapper.java.initmemory=256
wrapper.java.maxmemory=384
wrapper.java.additional.X=-XX:PermSize=256m
wrapper.java.additional.Y=-XX:MaxPermSize=256m
wrapper.java.additional.Z=-XX:NewSize=256m
wrapper.java.additional.V=-XX:MaxNewSize=384m
Run Mule again
Now, lets re-run mule from $MULE_HOME/bin by running command sh mule start. This time, our mule server should start successfully.
Now you can try building some applications and deploy to your mule on Raspberry Pi.
Conclusion
Mule ESB is a lightweight runtime. In this post, we learned how we can install Mule Community runtime on Raspberry Pi3.
Stay updated!
On this blog, I post articles about different technologies like Java, MuleSoft, and much more.
You can get updates for new Posts in your email by subscribing to JavaStreets feed here -
Lives on Java Planet, Walks on Java Streets, Read/Writes in Java, JCP member, Jakarta EE enthusiast, MuleSoft Integration Architect, MuleSoft Community Ambassador, Open Source Contributor and Supporter, also writes at Unit Testers, A Family man!